

Wokwi Simulator to streamline development on an embedded system
In this blog post, we’ll explore how you can harness the power of Wokwi to simulate embedded system hardware directly in your web browser. Additionally, we’ll delve into the use of their VSCode extension, which enables you to simulate the environment locally for enhanced speed.
My quest for simulators began when I realized the time-consuming nature of the deployment cycle while developing embedded systems. After days of toiling, it dawned on me that a simulator could significantly reduce the deployment time.
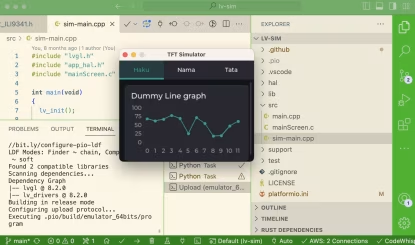
I had prior experience working with LVGL and its emulator, which served as a revelation. This experience spurred my search for a more versatile simulator to cater to various application needs. That’s when I stumbled upon Wokwi, an online simulator equipped with a plethora of remarkable features.
Wokwi Features
Some notable features of Wokwi include:
- Real-time Hardware Simulation: Wokwi provides a real-time simulation of embedded system hardware, allowing you to test your designs without the need for physical hardware.
- Extensive Library Support: You can access a wide range of libraries and components for your simulations.
- Customizable Environments: Wokwi allows you to customize your simulation environment to suit your specific project requirements.
While using Wokwi in the browser, I soon realized that, despite its advantages in replacing the need for physical hardware and manual reset button presses, it had its drawbacks. The simulation required building every time, which led to slower performance in the cloud compared to running it locally. Moreover, I hesitated to transfer all my projects to the cloud.
Why Wokwi locally
Integrating a simulator like Wokwi into your local development workflow, right within your IDE, offers several compelling advantages. These include:
- Speed and Efficiency: Simulating your embedded system locally ensures quicker testing and debugging, reducing development time.
- Offline Development: You can work on your projects without relying on an internet connection or cloud resources.
- Data Privacy: Keep your project data and code within your environment, addressing concerns about data security and privacy.
As I delved deeper into Wokwi’s tool, I discovered their VSCode extension, which is currently in beta. The best part? It’s free during the beta period, providing a fantastic opportunity to explore its capabilities without cost.
Wokwi for VS Code
Prerequisites
Before we dive into using Wokwi with VSCode, make sure you have the following prerequisites in place:
- VSCode: You’ll need Visual Studio Code installed on your system. If you haven’t already, you can download it here.
- Wokwi Simulator Extension: To integrate Wokwi with VSCode, you’ll need to install the Wokwi Simulator extension. You can find and install it from the Visual Studio Code Marketplace here.
It is not required to have PlatformIO running, but I use platformIO myself and the example I will be giving will use platformIO so I highly recommend you to use PlatformIO too. If you haven’t installed PlatformIO yet, follow these instructions on their website here to get it up and running.
Once you have both PlatformIO and the Wokwi Simulator extension for VSCode installed and ready, we can move on to the next steps.
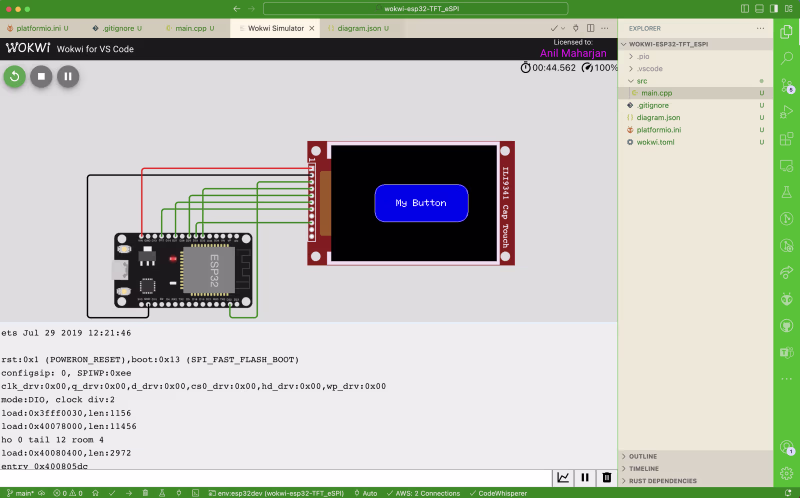
To get started with this tutorial, I’ve made the project available on GitHub. You can access it at the following repository: https://github.com/dejavu1987/wokwi-esp32-TFT_eSPI.
Now, let’s begin by creating the PlatformIO project. To do this, you’ll need to add a platformio.ini file to your project. This file configures your PlatformIO project and specifies the board and environment settings.
[env:esp32dev]
platform = espressif32
board = esp32dev
framework = arduino
lib_extra_dirs = ~/Documents/Arduino/libraries
monitor_speed=115200
I used lib_extra_dirs instead of lib_deps. Because I have set up my user_setup for TFT_eSPI inside my Arduino Library folder. You can configure your TFT_eSPI on your PlatformIO project as well. I will not go into the details as it is out of the scope of this post.
Next, add your scr/main.cpp with your application code.
#include <TFT_eSPI.h>
#include <SPI.h>

// #define TFT_MISO 33
// #define TFT_MOSI 27
// #define TFT_SCLK 12
// #define TFT_CS 22
// #define TFT_RST 32
// #define TFT_DC 25
// #define TFT_BL 13

// #define TOUCH_CS 26

#define TFT_ROTATION 1

TFT_eSPI tft = TFT_eSPI();

void drawButton(int32_t x, int32_t y, int32_t w, int32_t h, uint32_t color, uint32_t outline, String label)
{
  uint8_t r = min(w, h) / 4; // border radius

  tft.fillRoundRect(x, y, w, h, r, color);
  tft.drawRoundRect(x, y, w, h, r, outline);

  //Print the label
  tft.setTextColor(TFT_WHITE,color);
  tft.setTextSize(2);
  uint8_t tempdatum = tft.getTextDatum();
  tft.setTextDatum(MC_DATUM);
  uint16_t tempPadding = tft.getTextPadding();
  tft.setTextPadding(0);

  tft.drawString(label, x + (w/2), y + (h/2));
  tft.setTextDatum(tempdatum);
  tft.setTextPadding(tempPadding);

}

void setup(void) {
  Serial.begin(115200);
  tft.begin();
  tft.setRotation(TFT_ROTATION);
}

void loop() {
  drawButton((tft.width()-200)/2, (tft.height()-80)/2, 200, 80, TFT_BLUE,
                     TFT_WHITE, "My Button");
  delay(10000);
}
Building the Project
Before proceeding with the Wokwi configuration, make sure you can successfully build your project using PlatformIO. This step is crucial to ensure that your code compiles correctly. Execute the build command for your project.
Adding Wokwi Configuration Files
Wokwi requires specific configuration files to set up your project for simulation. These files are wokwi.toml and diagram.json. Let’s create and configure them:
wokwi.toml: wokwi.toml is the main project configuration file for Wokwi. In this file, you will specify various project settings and point Wokwi to the built binary files.
[wokwi]
version = 1
elf = ".pio/build/esp32dev/firmware.elf"
firmware = ".pio/build/esp32dev/firmware.bin"
Ensure that the paths specified for elf and firmware are correct and point to the location of the compiled binary files for your project.
diagram.json: The diagram.json file is used to define the components of your hardware setup, their positions, and wiring details.
{
  "version": 1,
  "author": "Anil Maharjan",
  "editor": "wokwi",
  "parts": [
    {
      "type": "wokwi-esp32-devkit-v1",
      "id": "esp",
      "top": 80.9,
      "left": -246.6,
      "rotate": 90,
      "attrs": {}
    },
    {
      "type": "board-ili9341-cap-touch",
      "id": "lcd1",
      "top": -58.88,
      "left": 43.14,
      "rotate": 90,
      "attrs": {}
    }
  ],
  "connections": [
    ["esp:TX0", "$serialMonitor:RX", "", []],
    ["esp:RX0", "$serialMonitor:TX", "", []],
    ["lcd1:GND", "esp:GND.1", "black", ["h-316.8", "v201.6", "h86.3"]],
    ["lcd1:CS", "esp:D22", "green", ["h-76.8", "v192", "h-38.7"]],
    ["lcd1:RST", "esp:D32", "green", []],
    ["lcd1:D/C", "esp:D25", "green", []],
    ["lcd1:SCK", "esp:D12", "green", []],
    ["lcd1:MISO", "esp:D33", "green", []],
    ["lcd1:MOSI", "esp:D27", "green", []],
    ["esp:VIN", "lcd1:VCC", "red", ["v-96", "h326.4"]]
  ],
  "dependencies": {}
}
Once all that is done you can request a license from Wokwi.
Press Shift+Cmd+P (mac) / Shift+Ctrl+P (else) to open your Command Palette.
Start typing request license
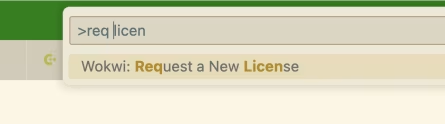
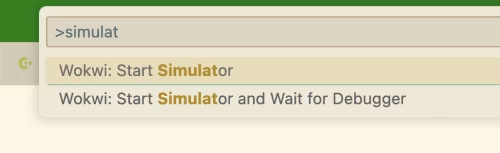
You will be asked to authenticate on your browser, and once done, you will be presented with a page with the License key and then you are returned to the VSCode once the activation is done. Then you just need to start the simulation by again opening up your Command palette and start typing “Simulator” and selecting Wokwi: Start Simulator.
If everything went okay, you should see the simulator running.