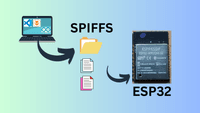
Writing data files to flash memory of ESP32
There are several reasons why you would want to write some data files to an ESP32 or similar MCU’s flash memory. In most of the projects, we need to work with configurations that we don’t want to hard code in our code. One of the most common use cases with ESP32 or similar MCUs is saving the SSID and password for wifi. There are a lot of other uses of config files, eg: persisting of the state of your system so that you can resume after the device restarts, saving preferences, and many more.
In this tutorial, we will talk about different ways to write these config files to ESP32 or similar modules.
First of all flash memory is a non-volatile memory meaning, the memory retains its state even when it is powered off. The primary use of flash memory is to store the sketch/firmware of the MCU. But as mentioned before additional data files can also be written in the same flash memory. In this tutorial, I will be specifically showing different ways to write data files to flash memory on an ESP32.
Prerequisite
Before writing a data file to an ESP32, the flash needs to be partitioned properly.
There are different partition table configurations you can choose from, that are provided by Espressif by default. The tables are in Comma Separated Values (CSV) format. One of the examples CSV looks like below.
# ESP-IDF Partition Table
# Name,   Type, SubType, Offset,  Size, Flags
nvs,      data, nvs,     0x9000,  0x5000,
otadata,  data, ota,     0xe000,  0x2000,
app0,     app,  ota_0,   0x10000, 0x200000,
spiffs,   data, spiffs,  0x210000,0x1E0000,
coredump, data, coredump,0x3F0000,0x10000,
The partition table describes different partitions, their types/subtypes, the addresses where they start, and their sizes.
In addition to default tables, you can create your custom partition table yourself if needed. We will not discuss that as we can work with one of the partition tables provided.
In the above partition table along with other data type partitions, you can see app0 and spiffs, which is correspondingly where the app/sketch and our data files live.
SPIFFS stands for Serial Peripheral Interface Flash File System. It’s a filesystem on flash and the MCU uses SPI to communicate with it.
Ways of writing data files to ESP32 Flash
Depending on the situation, different methods of writing data to flash may be needed. Following are a few ways data can be written to flash.
- From MCU itself, via app code
- Externally via Arduino IDE
- Externally via VSCode using Platform.io (I personally prefer)
From MCU itself, via app code
#define FILESYSTEM SPIFFS

#include <SPIFFS.h>

File file;

if(!SPIFFS.begin(true)){
  Serial.println("Error mounting SPIFFS");
  return;
}


file = SPIFFS.open("/wifi.txt", FILE_WRITE);
if(!file){
  Serial.println("Error opening the file in WRITE mode");
  return;
}
else
{
  Serial.println("Open file success");
}

String ssid= "MY_WIFI";
String pass = "MY_WIFI_PASSWORD";

if(file.println(ssid))
{
  Serial.println("SSID Written");
}

if(file.println(pass))
{
  Serial.println("PASSWORD Written");
}

file.close();
This is one way to write your config file in flash. The content saved could be an input coming from the user from various input means, like web forms, keyboard, etc.
Externally via Arduino IDE
This method and the next one are similar as they both use a development environment to write data to the flash, similar to how you flash your sketch to the MCU. This method is helpful when you have a lot of config files that your sketch requires to work properly and you have already created those config files manually. All you want to do is copy them over into the flash memory.
To write these files to flash using Arduino IDE, you first have to add all those files to a directory named /data in your project folder. You will require the older version (v1.x) of Arduino IDE Arduino 2.x does NOT support third-party tools like this yet. Once you have installed Arduino 1, you can download this tool Arduino ESP32 filesystem uploader.
Once you have downloaded the jar file and saved it under your Arduino tools folder as described on their instructions, the tool will appear under Arduino IDE’s Tools section.

Externally via VSCode with Platform.io
To write the data files to flash using VSCode IDE with Platform.io, you first have to add all those files to a directory named /data in your project folder. Then go to the Platform.io sidebar, under Project Tasks, select your device, and under Platform, first Build Filsystem Image, which will create a binary file of the whole data directory and then Upload Filesystem Image. Note your device needs to be booted in upload mode.
