

Backend to go! Bare minimum Lambda HTTP endpoint
Scenario
So you are developing a web or mobile app that is mostly static except for this one feature that would require a backend/database to store data.
We will be looking at the solution that would require least effort and knowledge of AWS technologies.
Prerequisites
- AWS Account
- Basic JavaScript knowledge
Why?
As described in the Scenario, you don’t want to spend a lot of time architecting this backend which has very minimal requirements. You just need one HTTP endpoint that will take some data in and store them in the database. Lambda is a serverless solution to run a function as a service, which is scalable by design, very cost-efficient, and requires no maintenance. DybamoDB is a serverless database that has autoscaling and requires no maintenance either.
Also, remember
There are architectures that are recommended for more advanced usage, like when you need caching, request validation, and more advanced security options. We are keeping it basic for simplicity.
Hammer time!
So let’s start building our Lambda function.
Before we start think about your users/visitors, what region are they going to use this endpoint from? Choose that region for better latency.
I will use eu-central-1 (Frankfurt). As that is closest to me and I will be using the endpoint for my own use.
Go to Lambda > Functions
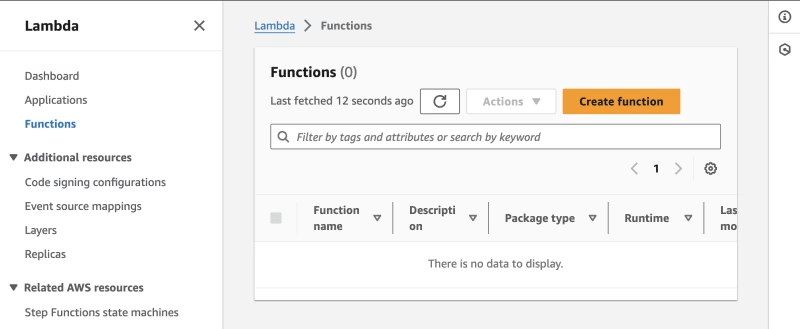
You will see the list of functions you had created before, click on “Create function”
Choose “Use a blueprint”
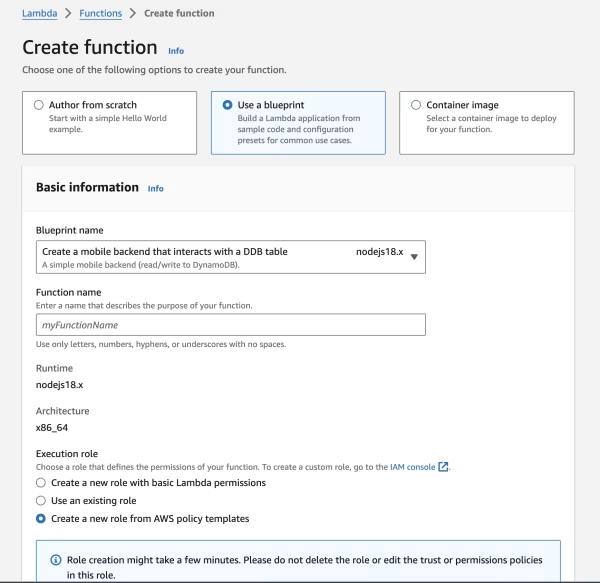
Select “Create a mobile backend that interacts with a DDB table nodejsx.x”
Give it a name and leave “Create a new role from AWS policy templates” and name the new role.
Update the function code to your need, and click the “create function” button. I am using my location tracker app’s function as an example here. I needed an endpoint where I could send my location read by a GPS module and save them in the db so I could retrieve them later.
import { DynamoDB } from "@aws-sdk/client-dynamodb";
import { DynamoDBDocument } from "@aws-sdk/lib-dynamodb";

const dynamo = DynamoDBDocument.from(new DynamoDB());

export const handler = async (event) => {
  console.log("Received event:", JSON.stringify(event, null, 2));
  if (!event.rawPath.startsWith("/l/")) {
    return {
      statusCode: 404,
      body: "NOT Found",
      headers: {
        "Content-Type": "text/plain",
      },
    };
  }
  const payload = {};
  payload.Item = { location: event.rawPath.replace("/l/", "").split(",") };
  payload.Item.id = "loc" + Math.random();
  payload.TableName = "locationTracker";
  try {
    await dynamo.put(payload);
    return {
      statusCode: 200,
      body: "OK",
      headers: {
        "Content-Type": "text/plain",
      },
    };
  } catch (e) {
    console.log(e);
    return {
      statusCode: 500,
      body: "ERROR",
      headers: {
        "Content-Type": "text/plain",
      },
    };
  }
};
In this example,
- We first set up the lambda function
- The function is triggered by an HTTP request.
- It checks if the request path starts with
/l/. If not, it returns a404“NOT Found” response. - If the path starts with
/l/, it proceeds to the next steps.
- Payload and DynamoDB Interaction:
- The function constructs a payload object.
- It extracts the location information from the request path (after removing
/l/). - A random ID (prefixed with
loc) is generated for the item. - The DynamoDB table name (“locationTracker”) is specified in the payload.
- Database Interaction and Response:
- The function attempts to put the payload into the DynamoDB table.
- If successful, it returns a
200“OK” response. - If there’s an error (e.g., permission issues, table not found), it logs the error and returns a
500“ERROR” response.
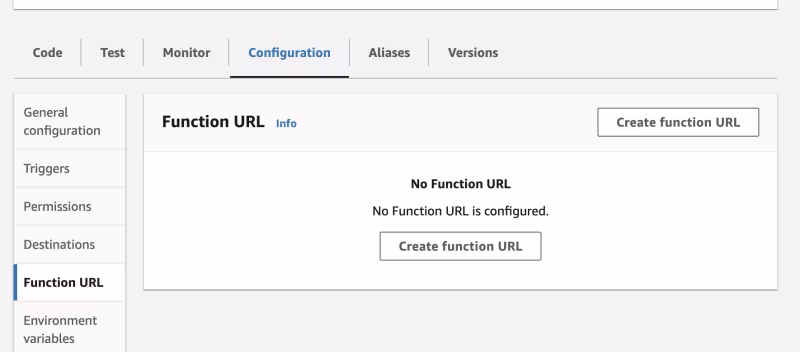
Setup a URL for the endpoint
To be able to access this endpoint we will need a URL. To create a URL for this function, we will add it via,
Configuration > Function URL -> press “Create function URL”
Use “NONE” for “Auth type”. As we want to make it publicly accessible.
You may set up CORS behavior if you need it.
Create DynamoDB
In AWS console go to DynamoDB
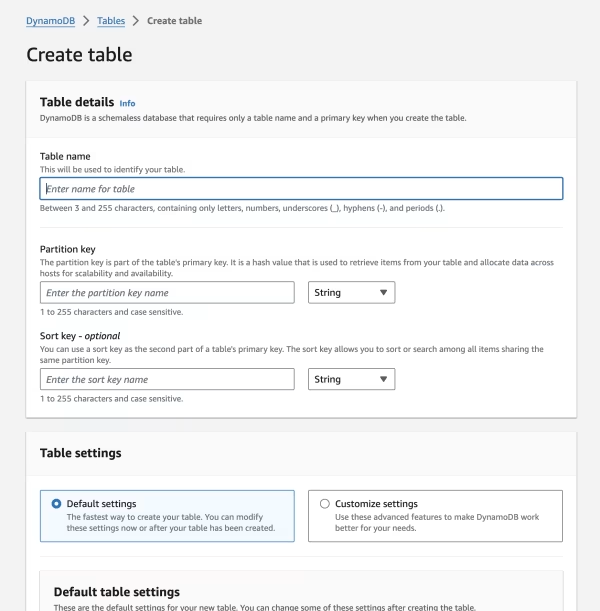
For “Partition key” use “id”
Generate a UUID for id field when you insert into this table.
Ready to ping the endpoint
Now you are ready to ping the endpoint,
The URL should look something like https://[xxx].lambda-url.[region].on.aws/l/latitude,longitude